Export to DaVinci Resolve
Send a ScreenKite project to DaVinci Resolve as an FCPXML timeline with a rendered screen layer, your original camera clips and SRT captions.
这篇文章尚未翻译到你的语言,当前显示英文版本。
Export to DaVinci Resolve writes a folder that Resolve can import as a timeline. ScreenKite renders everything Resolve cannot rebuild, such as the cursor, zooms, background, rounded corners and shadow, into one screen layer. Your camera clips stay separate, as the original files, so you can grade and reframe the camera in Resolve.
Availability
- The full version of this export is in ScreenKite Alpha 2.3.2 (764) and later.
- ScreenKite 2.3.1 and 2.3.2 also have Export to DaVinci Resolve…, but an earlier version of it. In those versions, the camera position in side-by-side layouts, mirrored cameras, and cards or titles drawn over the camera can come out differently in Resolve.
- On the free plan, the screen layer carries the ScreenKite watermark, as other exports do. Pro removes it.
How to Export
- Open your project in ScreenKite.
- Choose File → Export to DaVinci Resolve….
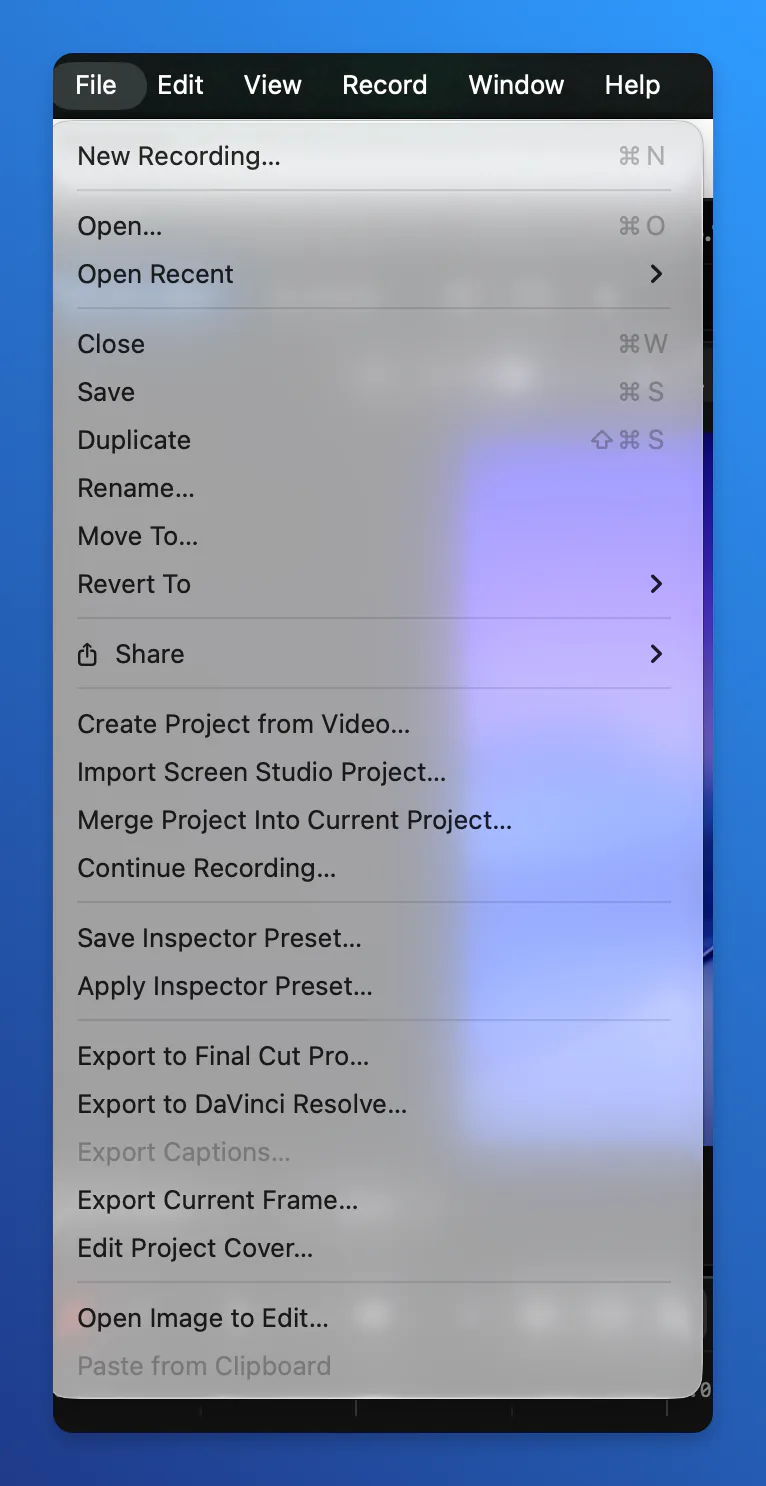
- The Export to DaVinci Resolve save panel opens. The name is your project name plus Resolve. Change it if you like.
- Choose where to save, then click Save.
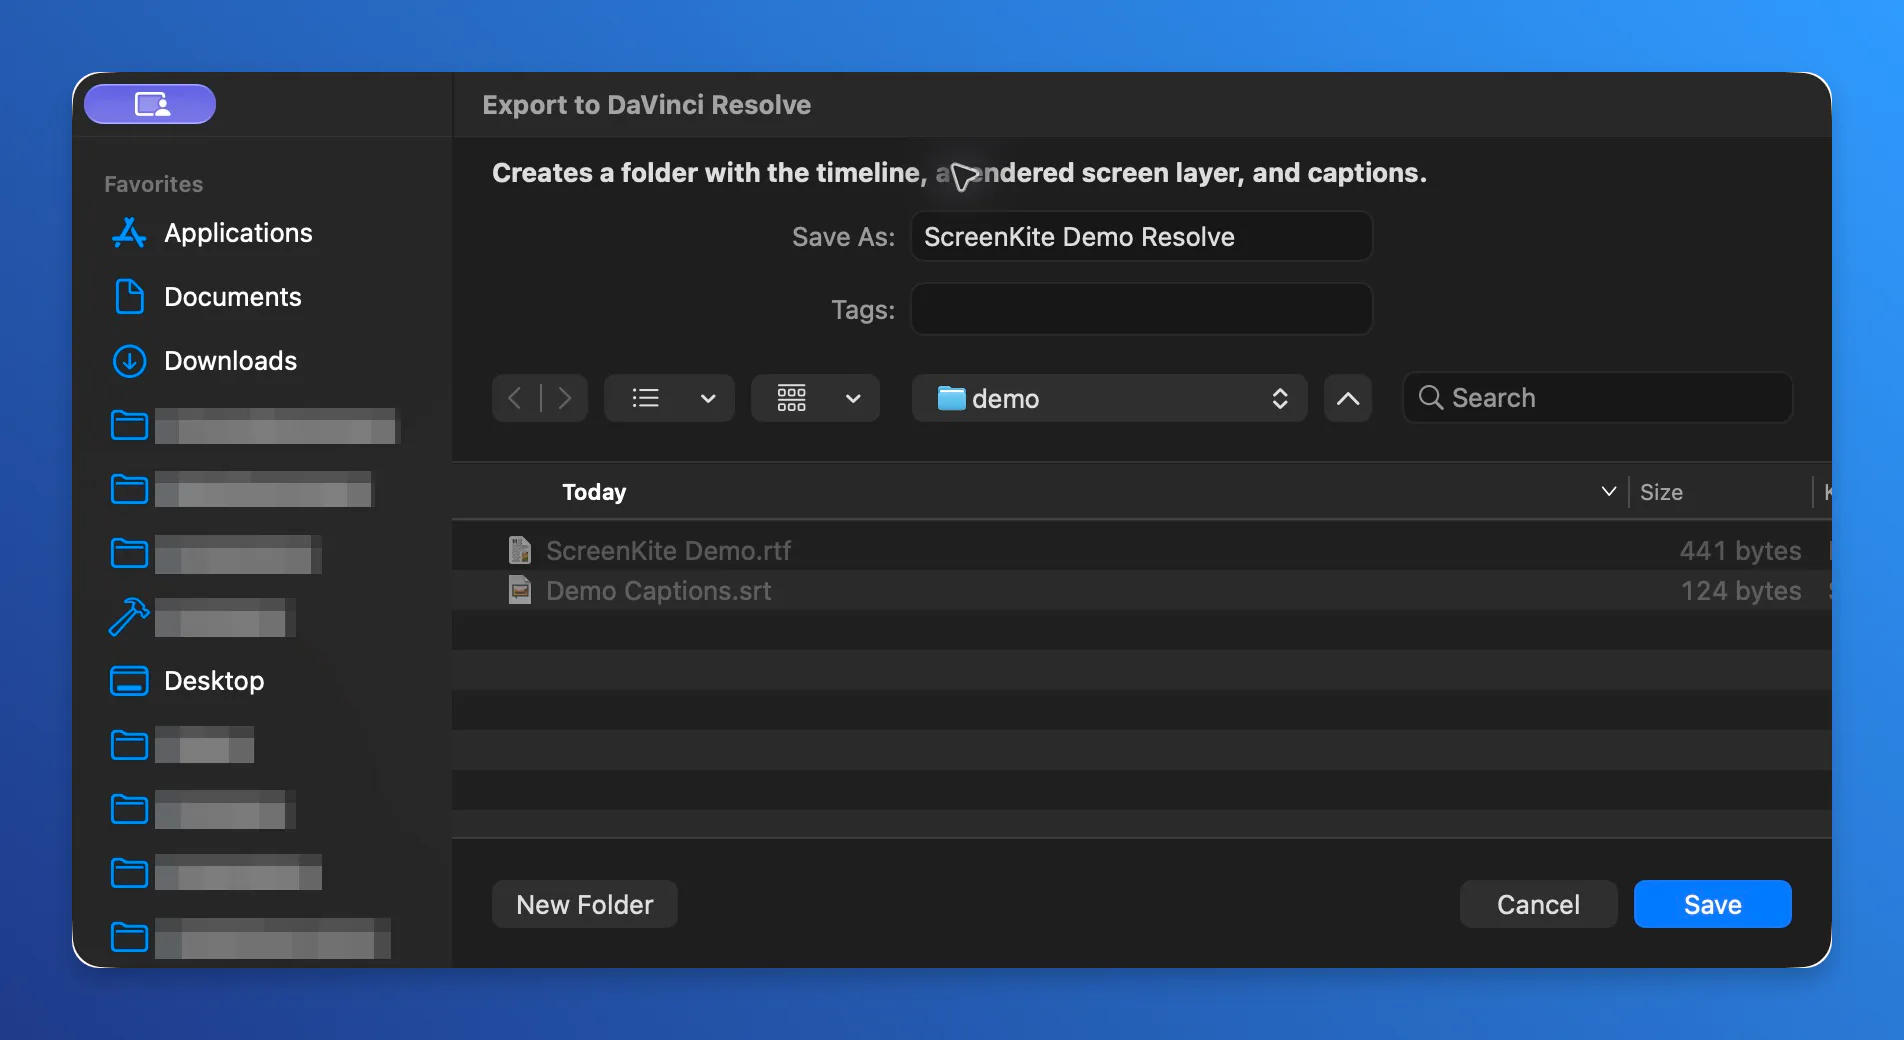
There is no separate settings step. The status bar shows Exporting to DaVinci Resolve… while ScreenKite renders, then Exported to DaVinci Resolve. Finder opens with the .fcpxml file selected.
If your camera uses Remove Background and it is still processing, the export waits until it finishes.
What's in the Export Folder
ScreenKite creates a folder with the name you chose. If a file with the same name is already in that folder, ScreenKite replaces it.
| File | When you get it | What it is |
|---|---|---|
<name>.fcpxml | Always | The timeline, in FCPXML 1.11. Import this file into Resolve. |
<name> - Screen.mov | Always | Your whole edit rendered at the canvas size, in ProRes 422 HQ, with the mixed audio. |
<name> - Over Camera.mov | When the project shows a camera | ProRes 4444 with transparency. It holds what ScreenKite draws on top of the camera, such as cards, titles and blur. |
<name>.srt | When the project has captions | Your captions as plain SRT subtitles. |
<camera> - Mirrored.mov | When the camera is mirrored | A flipped copy of the camera clip. The timeline file can't tell Resolve to flip a clip, so ScreenKite writes a flipped copy instead. |
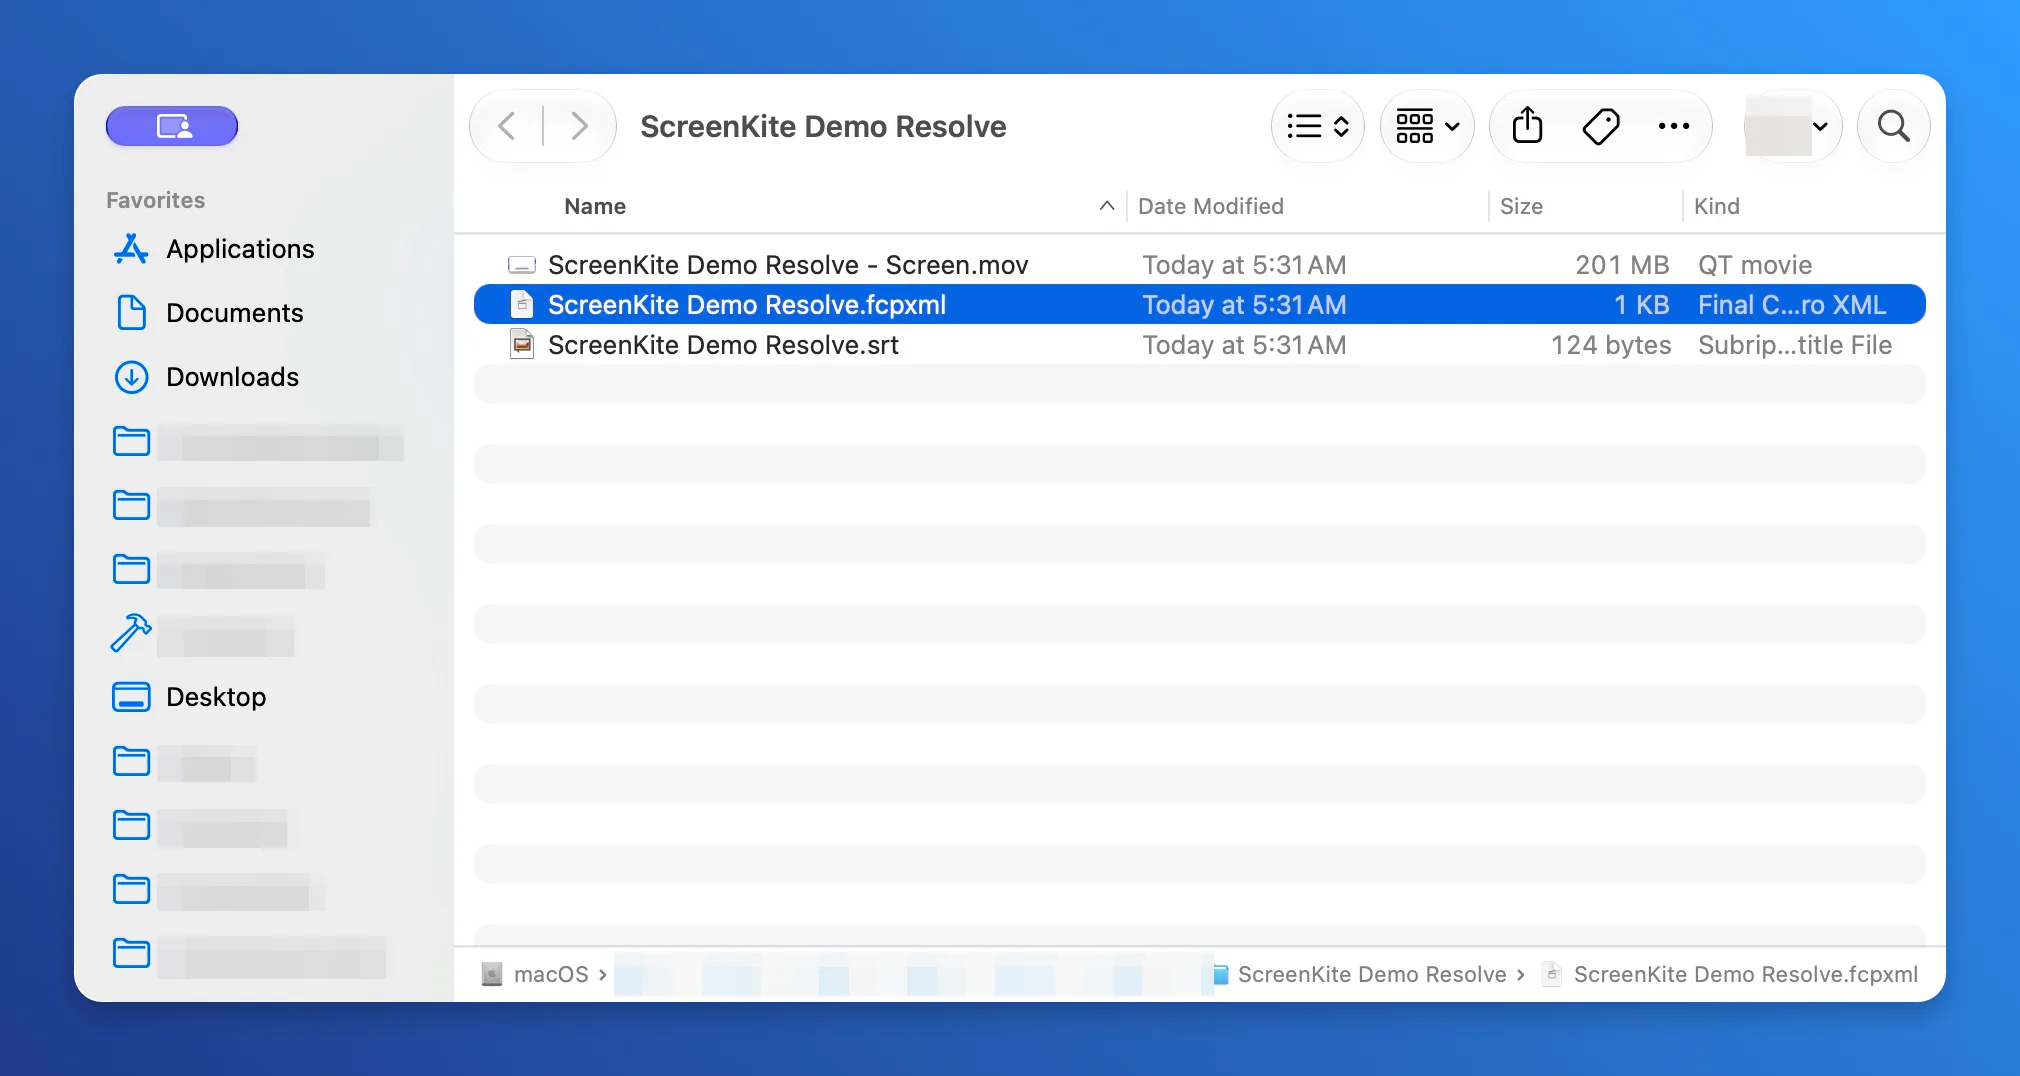
ProRes files are large. As a guide, an 8-second 4K project with no camera came to about 190 MB. Check that the destination has room before you export a long project.
Import into DaVinci Resolve
- Open DaVinci Resolve and create a new project, or open an existing one.
- Choose File → Import → Timeline….
- Select the
.fcpxmlfile in the export folder and click Import. - In the import dialog, keep the options that set the project settings and import the source clips automatically. Click OK.
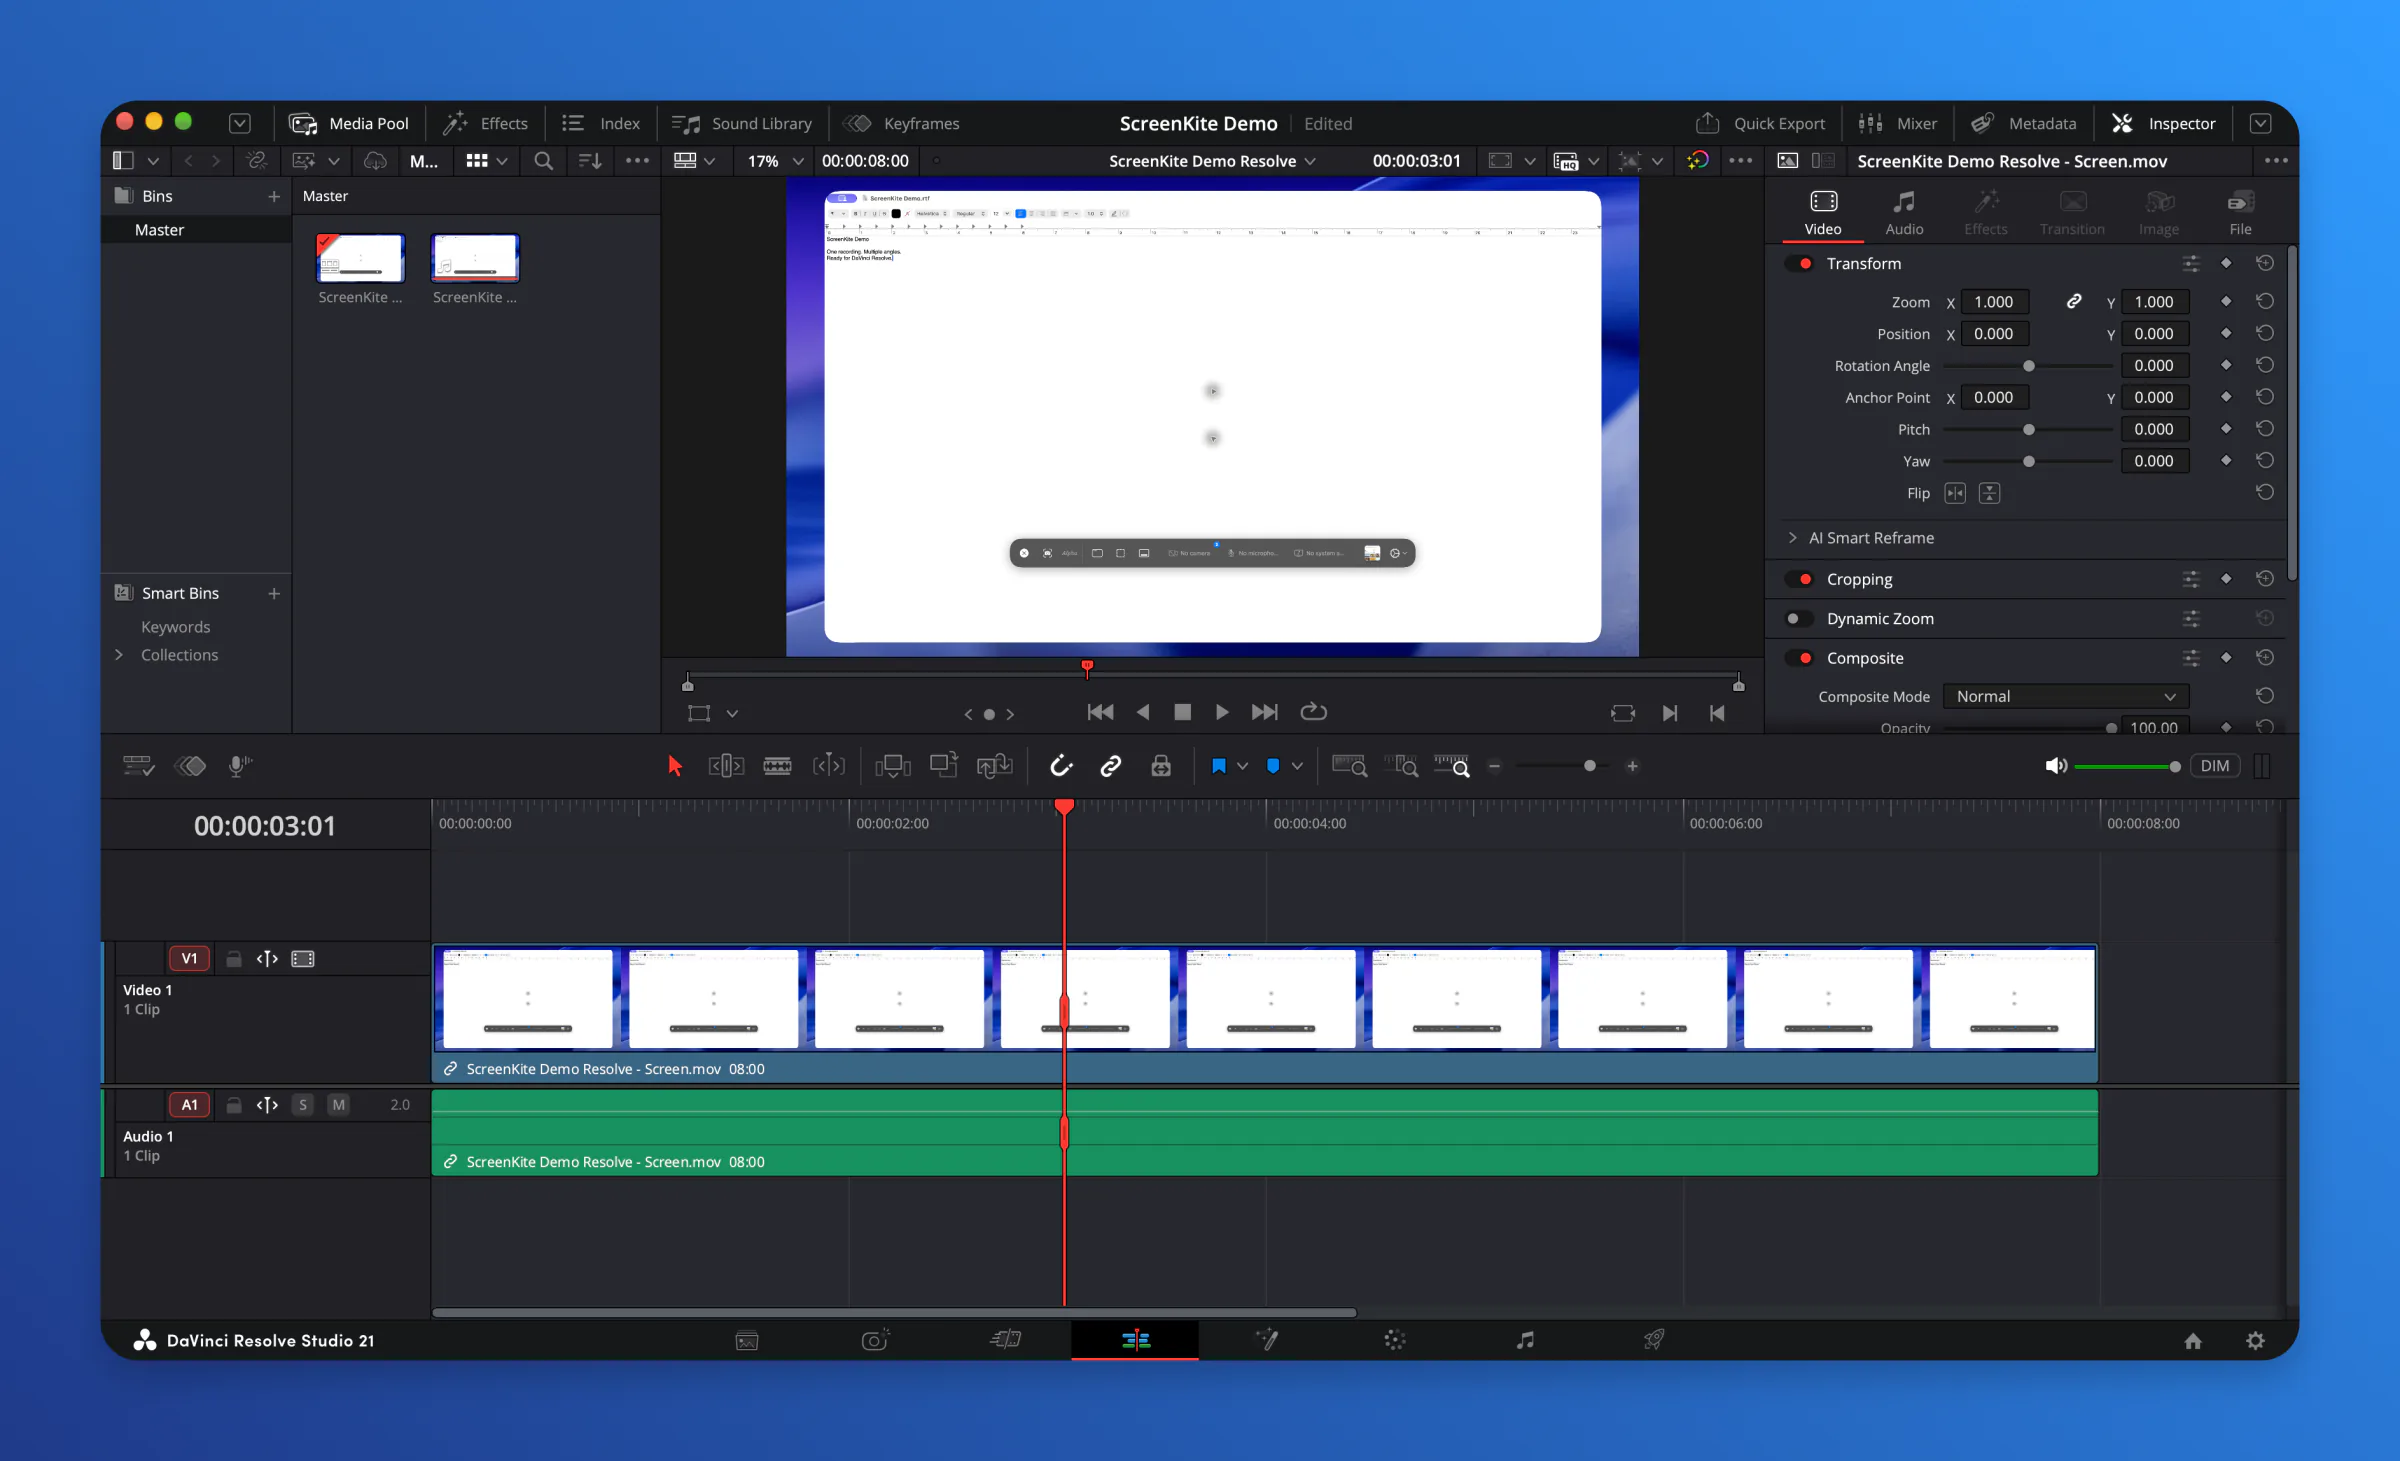
To add the captions, choose File → Import → Subtitle… in Resolve, select the .srt file, and drag it from the Media Pool to the timeline.
How the Timeline Is Built
From bottom to top, the Resolve timeline has:
- Screen: the rendered screen layer. It covers the whole timeline and carries the project audio.
- Camera: your original camera clips, where they sit in ScreenKite. Position, scale, crop and opacity are set with keyframes, so the camera moves and resizes as it does in ScreenKite. Each camera clip keeps its own audio, volume and mute.
- Over Camera: the transparent layer with anything that ScreenKite draws over the camera. Its audio is muted.
If the project has no camera, you get only the screen layer.
What Carries Over and What Doesn't
| Editable in Resolve | Rendered into the screen layer |
|---|---|
| Camera clips, as the original files | Cuts, trims and speed changes on the screen recording |
| Camera position, scale, crop and opacity, with keyframes | Cursor effects, zooms and pans |
| Camera audio volume and mute | Background, padding, rounded corners and shadow |
| Captions, as an SRT file | Transitions, overlays, cards, titles and blur |
| Music, sound effects, ducking and audio effects (mixed into the screen layer audio) |
Some things change on the way:
- Captions go to the SRT file as plain text. Caption styles do not carry over, and the captions are not burned into the screen layer. If you don't import the SRT, the export has no captions.
- Mirrored camera: the camera is either mirrored for the whole export or not at all. It is mirrored if it is mirrored for most of the time it shows in ScreenKite.
- Center on face: the camera crop stays centered in Resolve. Face-centered cropping does not carry over.
- Multi-camera recordings: Resolve gets what the project plays, the main screen and the main camera. Extra camera and display angles are not part of the export.
Troubleshooting
Clips show as Media Offline in Resolve
The timeline points to the files by their full path on disk: the files in the export folder and the camera files inside your ScreenKite project. If you moved, renamed or deleted any of them, Resolve shows them as offline. Put the files back, or select the clips in the Media Pool and use Relink Selected Clips… to point Resolve to the new place. Keep the ScreenKite project where it was until you finish in Resolve.
The frame rate doesn't match
The export uses your project's frame rate. Import into a new Resolve project and let Resolve set the project settings from the timeline. If you import into an existing project with a different frame rate, Resolve may conform the clips, which can shift cuts by a frame.
The Over Camera layer is black, or the camera is hidden
The Over Camera layer should be transparent except for what ScreenKite draws over the camera. If Resolve shows it as solid black, select the clip in the Media Pool, open Clip Attributes, and set the alpha mode so Resolve uses the alpha channel. Then tell us your Resolve version with Send Feedback….
The camera position is off
Update to ScreenKite Alpha 2.3.2 (764) or later and export again. Earlier versions place the camera differently in some layouts. If the camera is still off, send feedback with a description of the layout.
The export failed
ScreenKite shows DaVinci Resolve Export Failed with the reason. Check that the destination has enough free space for the ProRes files and that you can write to it, then export again.
I don't see Export to DaVinci Resolve… in the File menu
Open a project first. The item works only with a project open. If you still don't see it, update ScreenKite.
FAQ
Do I need DaVinci Resolve Studio?
The export was checked with DaVinci Resolve Studio 21. The import uses File → Import → Timeline…, which is in the free edition too, but we have not tested the free edition.
Can I edit the zooms and cursor in Resolve?
No. They are rendered into the screen layer. Make those changes in ScreenKite and export again.
Can I export to Final Cut Pro instead?
Yes. Use Export to Final Cut Pro (FCPXML). That export writes an editable timeline that points to your media and does not render a screen layer.
Related Guides
- Export to Final Cut Pro (FCPXML)
- Export Settings
- Webcam & Microphone: camera crop, mirror and background removal
- Multi-Camera & Multi-Display Recording